

Enable API access
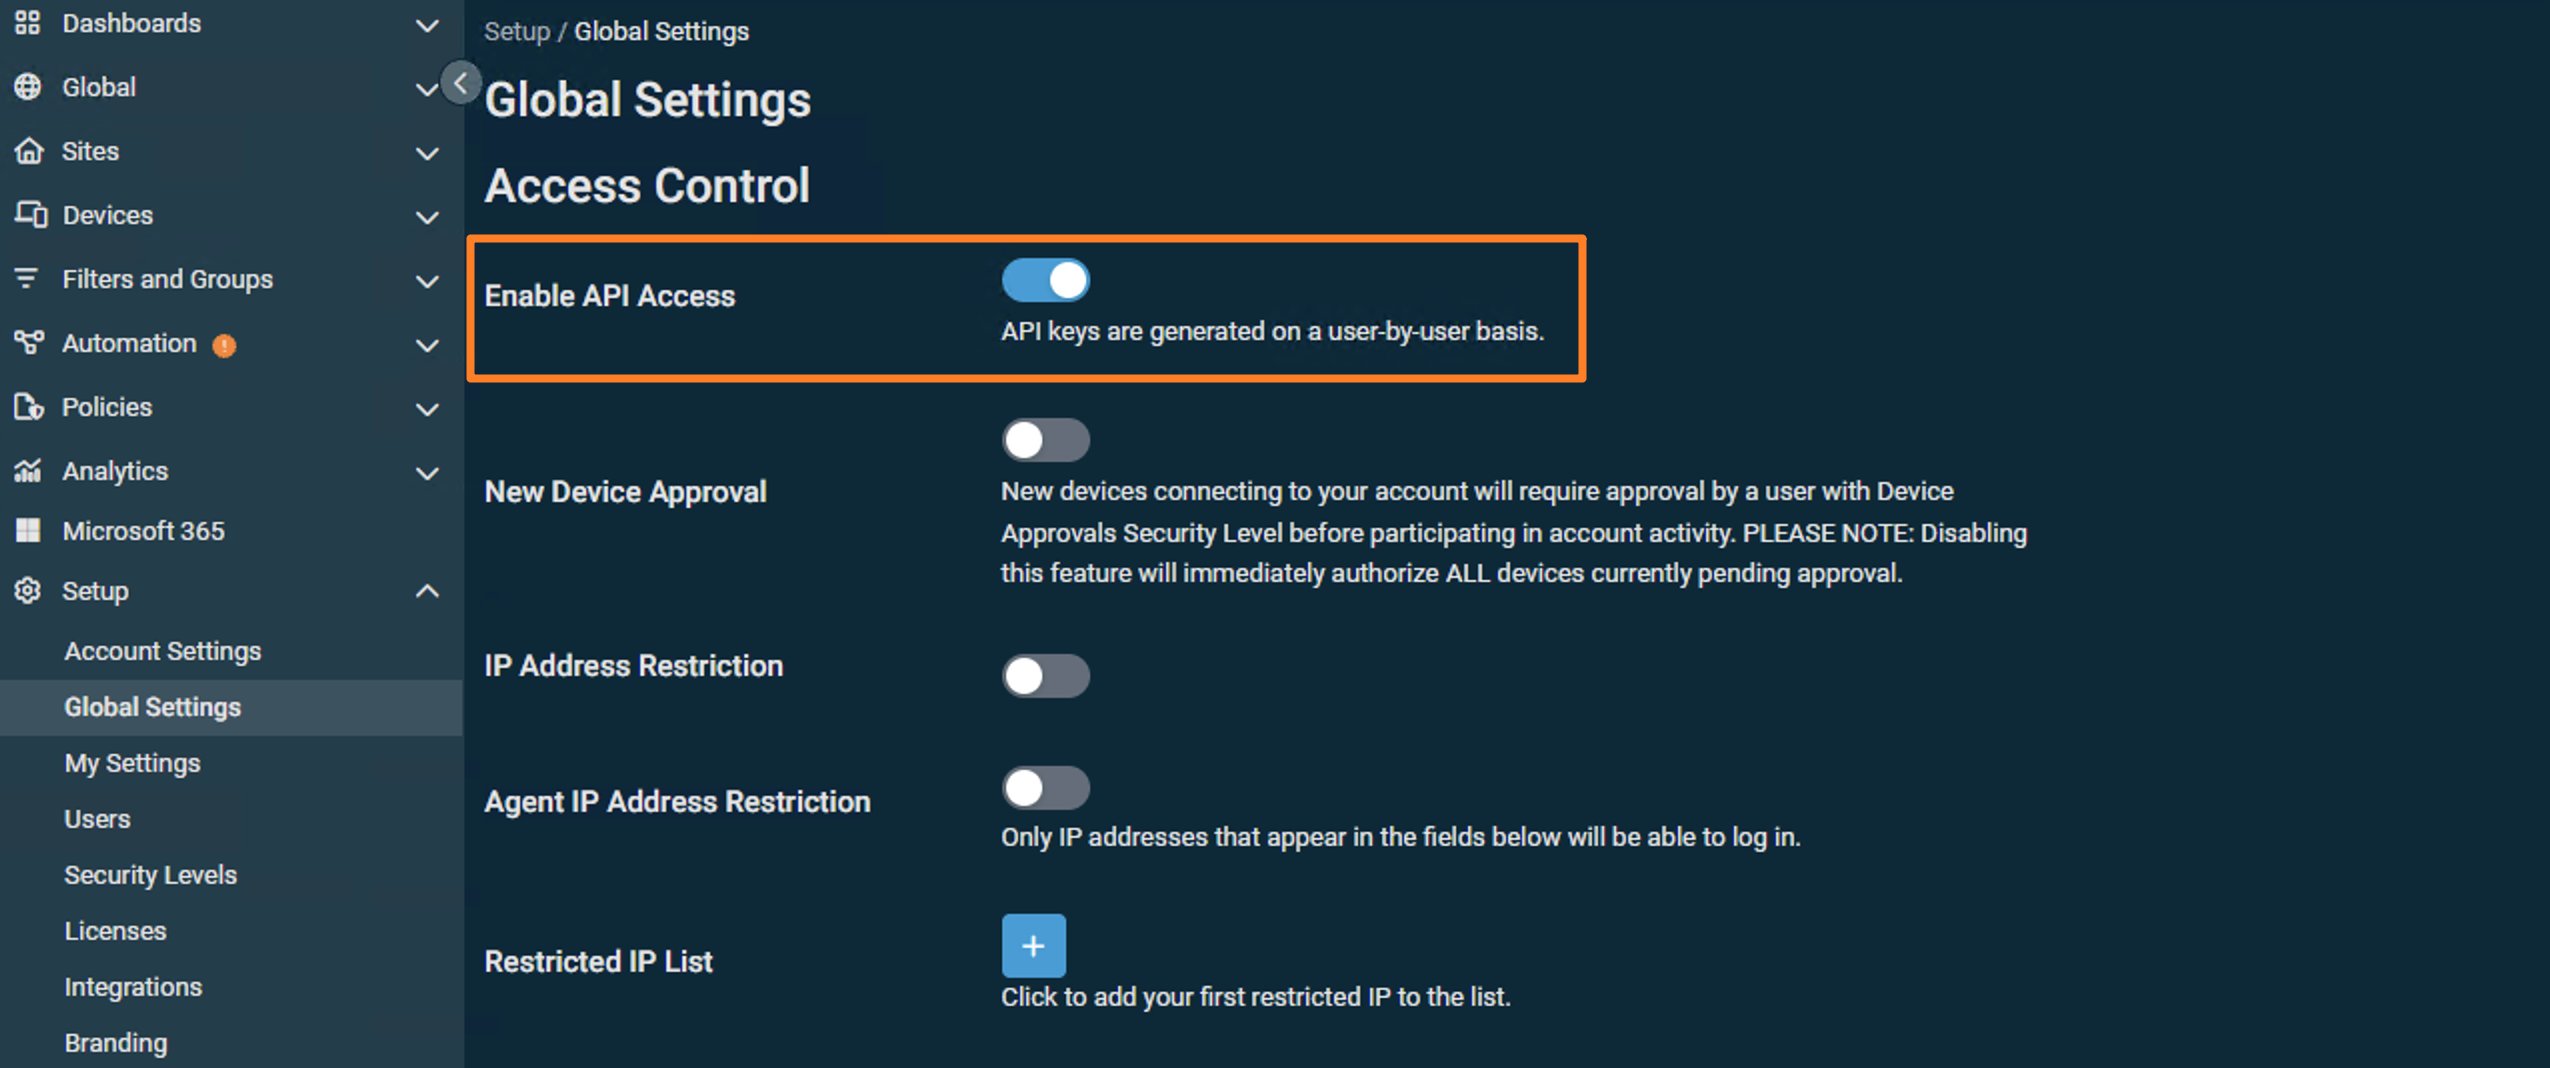
- In Datto RMM, go to Setup → Global Settings.
- Under Access Control, turn on Enable API Access. Keys are created per user. This switch has to be on first, or the API section won’t appear on the user page.
Create a view-only security level
MSPilot only lists sites and devices. Don’t use administrator, and don’t grant Manage on devices or jobs.- Go to Setup → Security Levels and create a security level. Name it something you’ll recognize, such as
MSPilot. - Under Device visibility, turn on Sites and click Add all. Without this, the API user cannot see any sites or devices, even with View permissions. Connecting in MSPilot can still succeed because that step only checks the account.
- Under Permissions, turn on the Sites and Setup sections, then set only:
- Sites → Sites: View
- Sites → Devices: View
- Setup → Global Settings: View
- Leave Jobs, Components, and every Manage permission off. You can turn off Remote control tools; MSPilot does not use them.
- Save the security level.
Create a Datto user
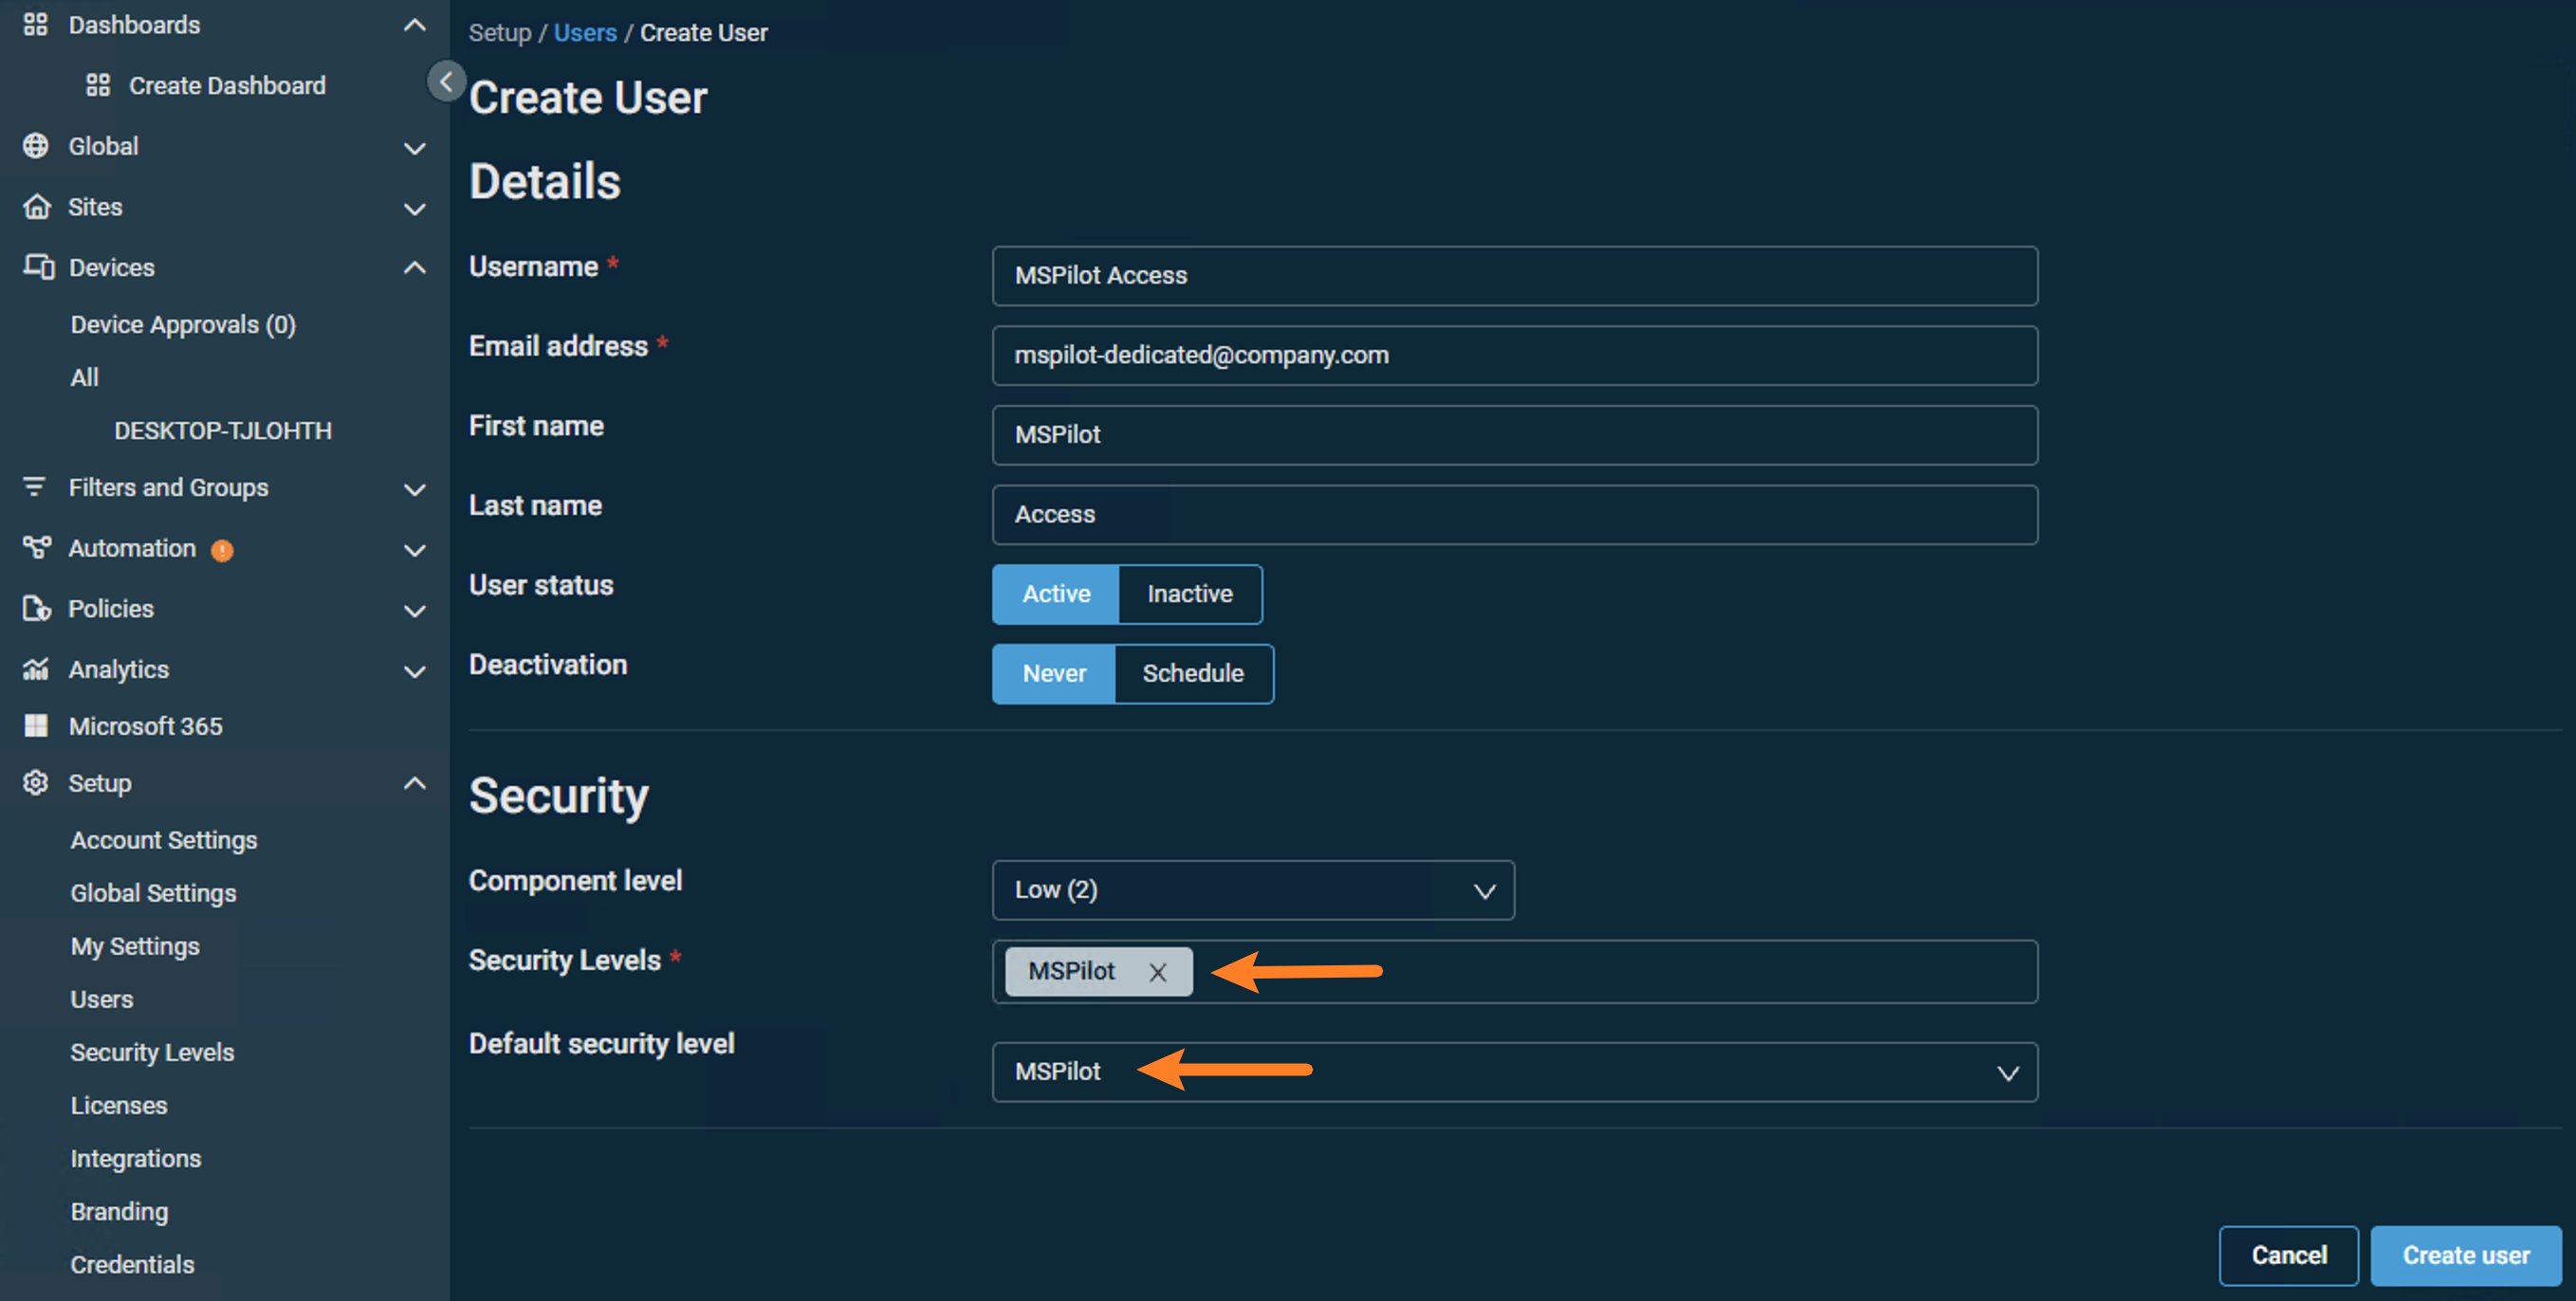
- Go to Setup → Users and click Create user. You can generate keys on an existing user instead. A dedicated user named
MSPilotis easier to revoke later. - Enter a Username and Email address. Leave User status set to Active.
- Under Security (this is for the Datto console, not the API keys):
- Leave Component level at the default Low (2).
- Set Security Levels to the
MSPilotview-only level you created. - Set Default security level to that same level (the list only includes the levels you assigned).
- Click Create user.
Generate API keys
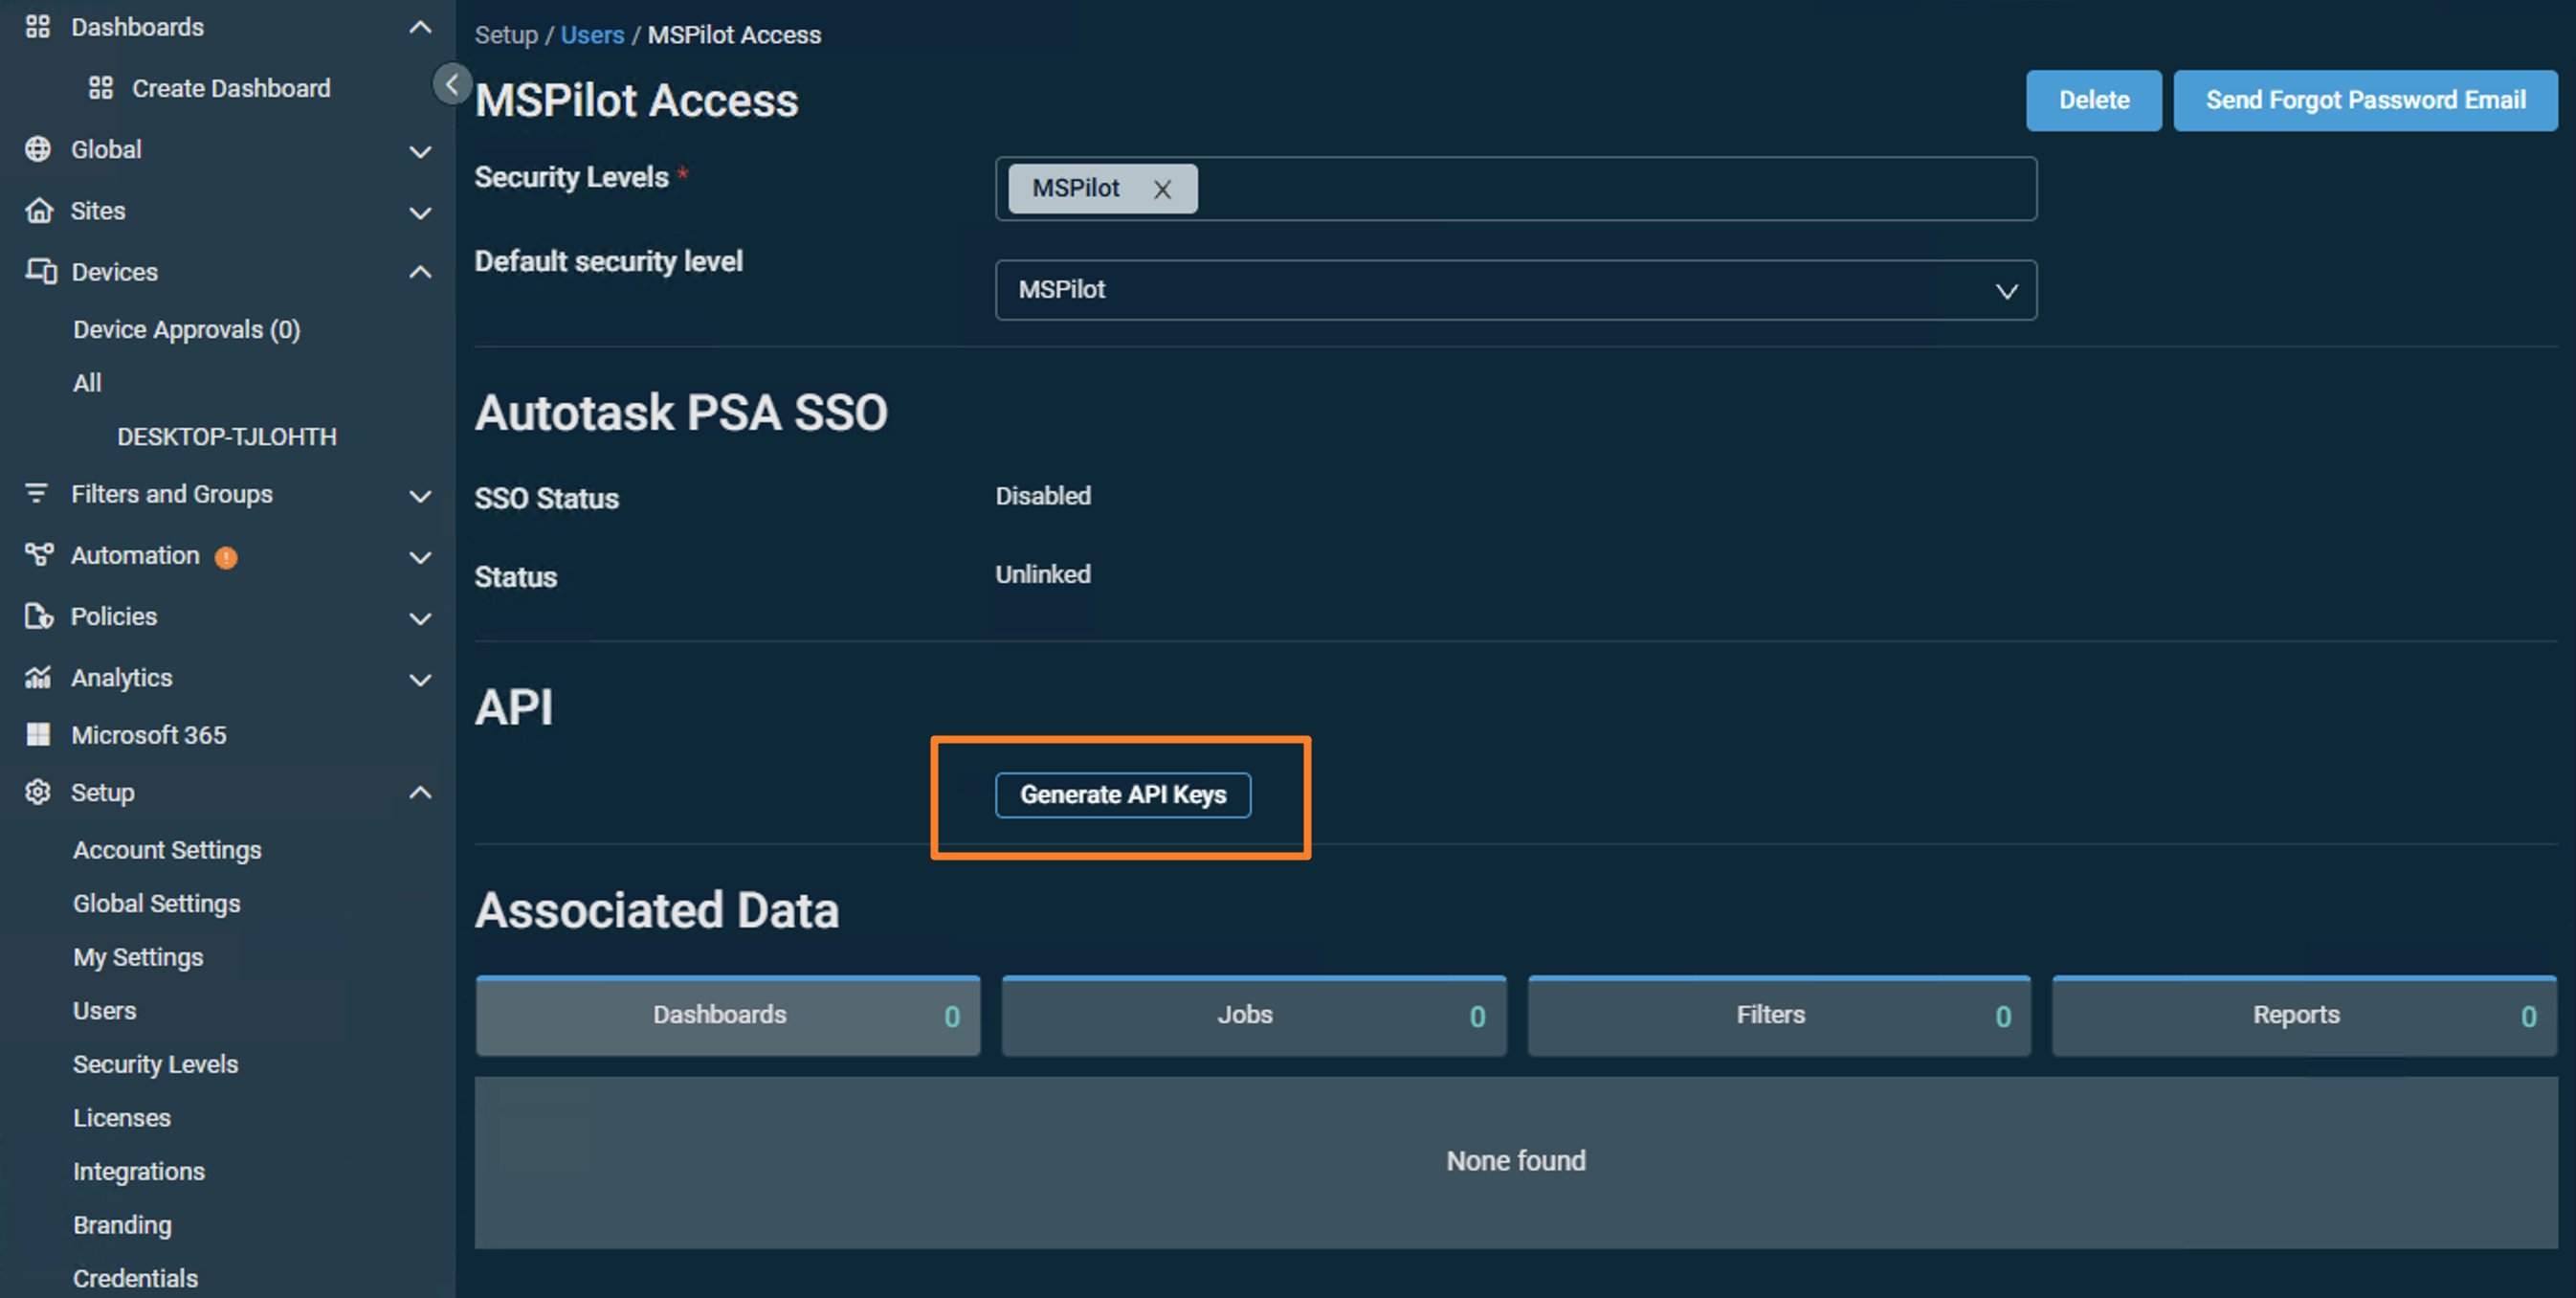
- Open Setup → Users and click the user you just created.
- In the API section, click Generate API Keys. The API fields are hidden until you do this.
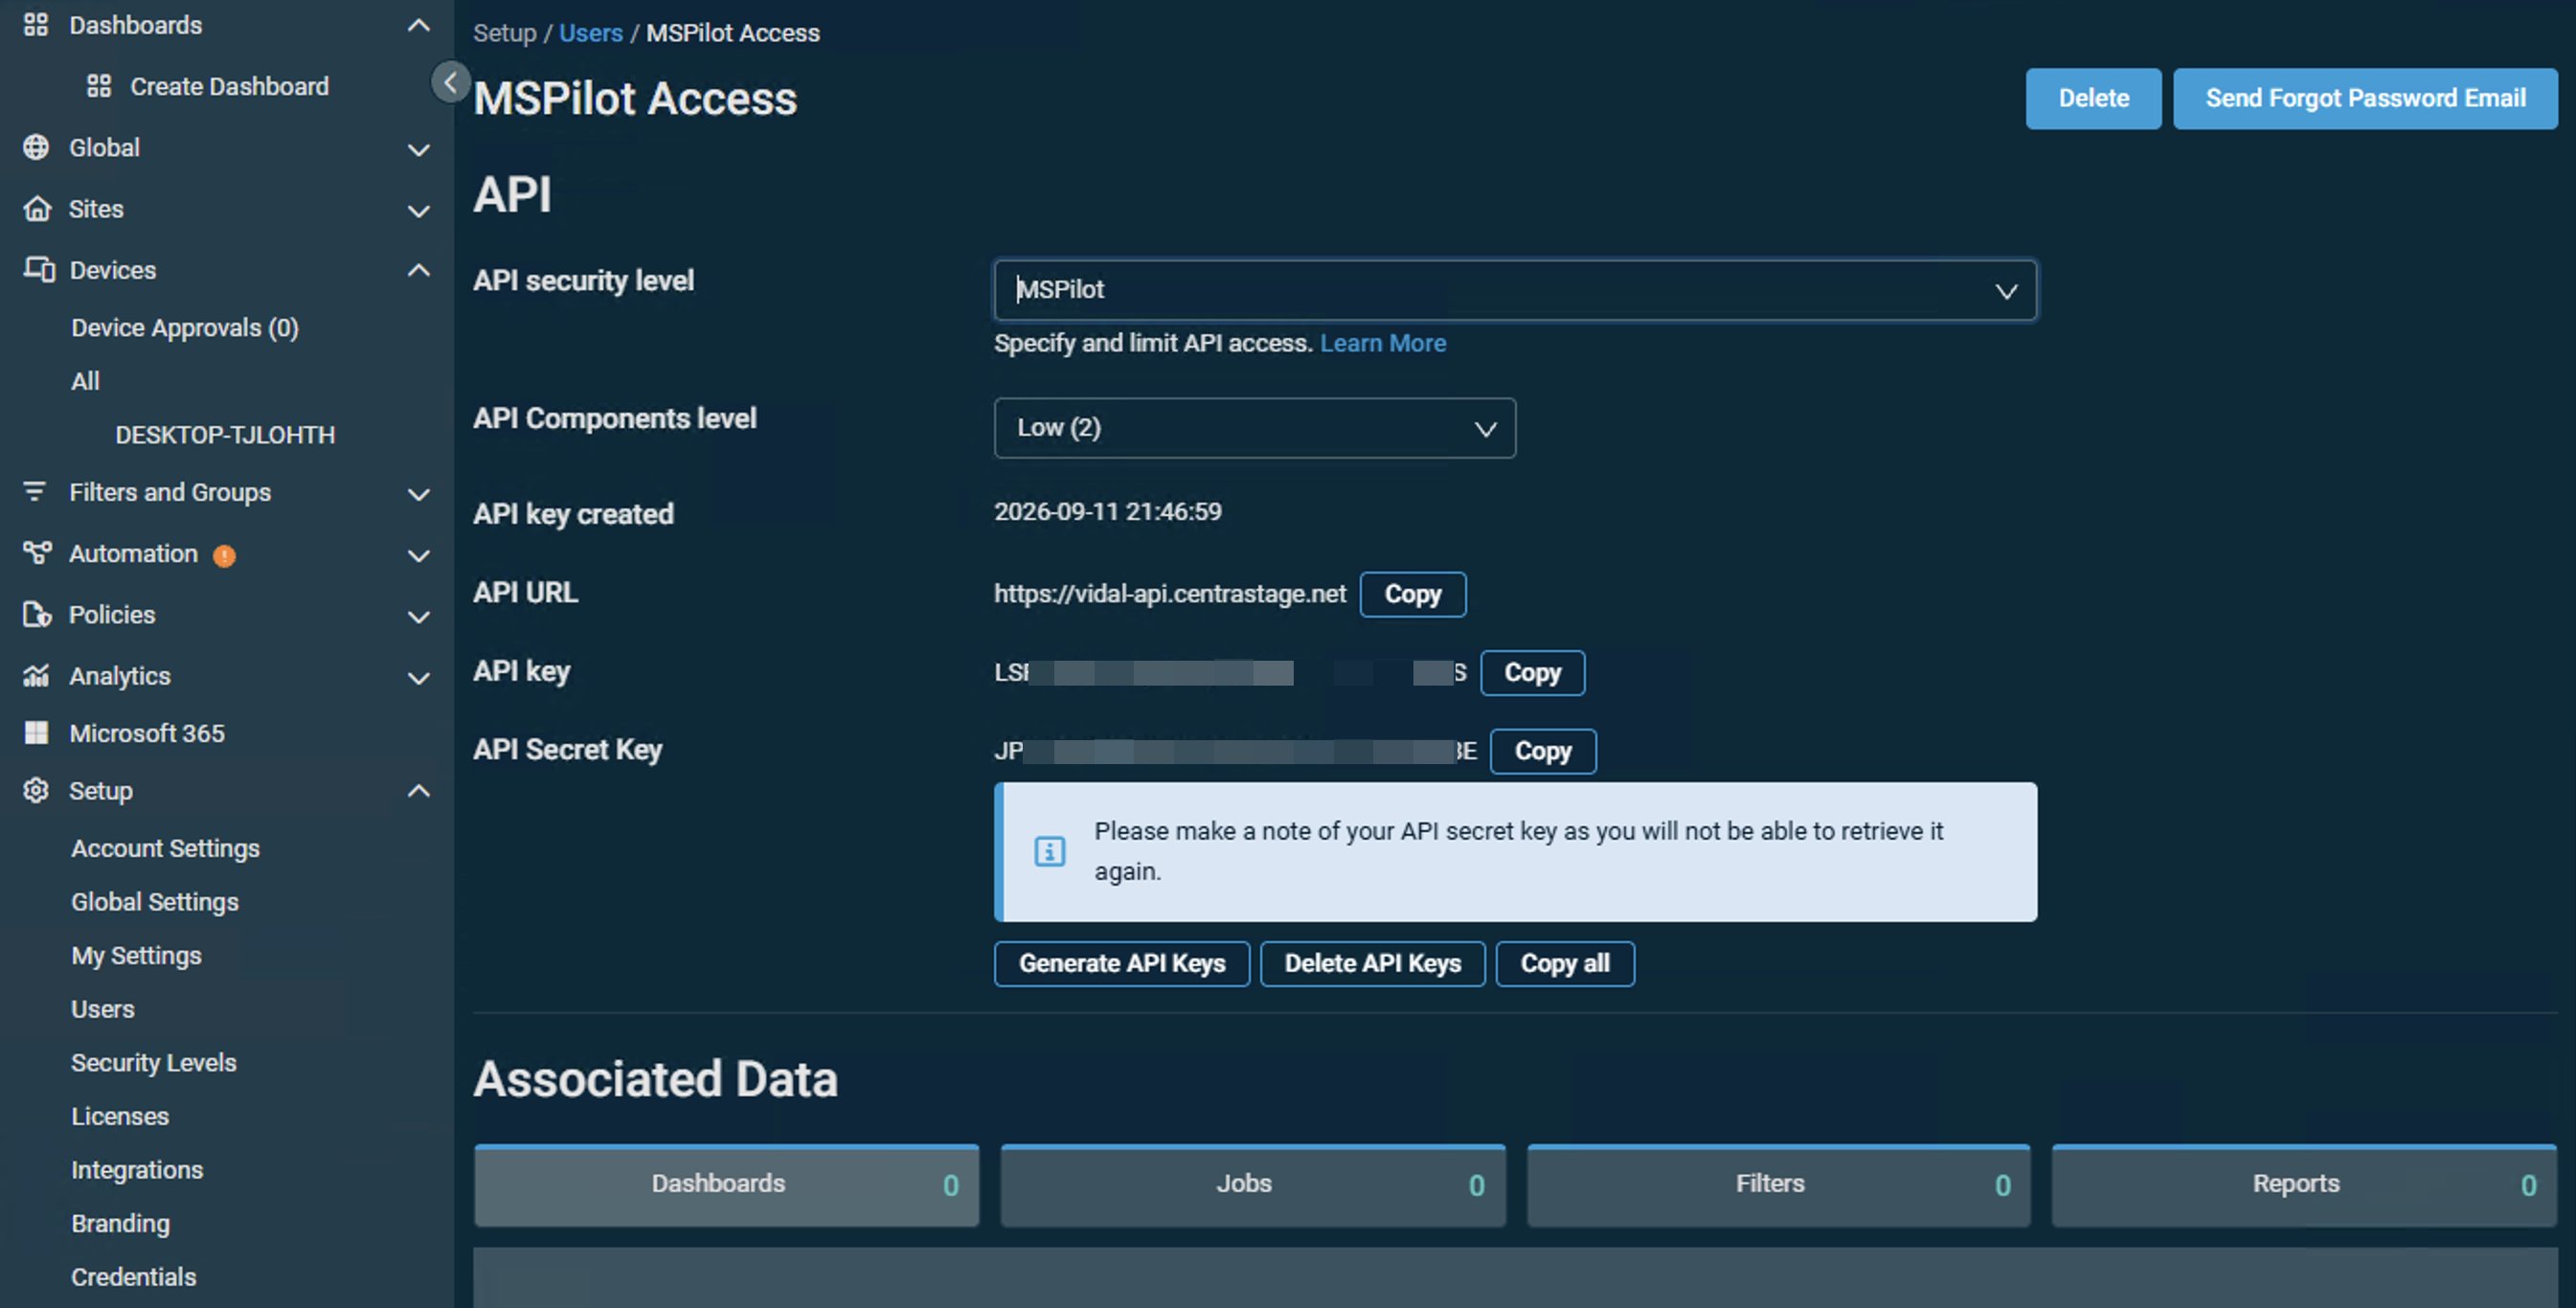
- Set API security level to the same
MSPilotview-only level. Don’t use administrator. - Leave API Components level at the default Low (2). MSPilot does not run components.
- Copy API key, API Secret Key, and note the API URL to a password manager, then click Save User. Datto shows a notice that you cannot retrieve the secret again. Generating keys again invalidates the previous pair.
Connect Datto RMM
- In MSPilot, open Integrations and choose Datto RMM.
- Select the Platform that matches the URL you sign in to Datto RMM with. If your API URL is
https://vidal.rmm.datto.com/..., choose Vidal. - Paste API key and API secret.
- Click Connect Datto RMM.
After you connect
MSPilot syncs devices from Datto RMM into your clients. Map each client to the Datto site that should supply its device inventory. Each Datto site can map to only one client.Install the agent
Connecting syncs devices. It does not install the agent.Windows
On the client, open Deployment. Under AI applications, tick the apps to install, then choose Copy script (mspilot-deploy.ps1). The copy is a short launcher: replace any older MSPilot script saved in Datto once. In Datto, save it as a Component named MSPilot install and enroll with a timeout of 5400 seconds. On Devices, select the machines and choose Create a Job, not Quick Job. Add the Component and set Execution to run as SYSTEM. When Claude Desktop is included, keep a user signed in during the run, and restart Windows if the job reports reboot_required=true. You do not schedule a pull job; the agent schedules its own. Details are on Install.
macOS
On the client, open Deployment, pick macOS, and choose Copy script. In Datto, create a new Component. Only change these fields:
Save the Component. On Devices, select the Apple Silicon Macs (macOS 12 or later) and run it as a Quick Job. Quick jobs run as root on macOS, so nobody needs to be signed in. The signed-in user’s AI apps are configured right away; other users at their next sign-in, then every 3 minutes. You can schedule the same Component daily; running it again is a safe repair. You do not schedule a pull job in your RMM; the agent runs its own config pull for each user at sign-in and every 3 minutes. What success and each exit code look like: macOS.